The Island Batik Challenge for March was a free month! We could decide to make what ever we wanted! What fun! SO MANY things came to mind! I had a hard time narrowing it down and actually made TWO projects for this month!
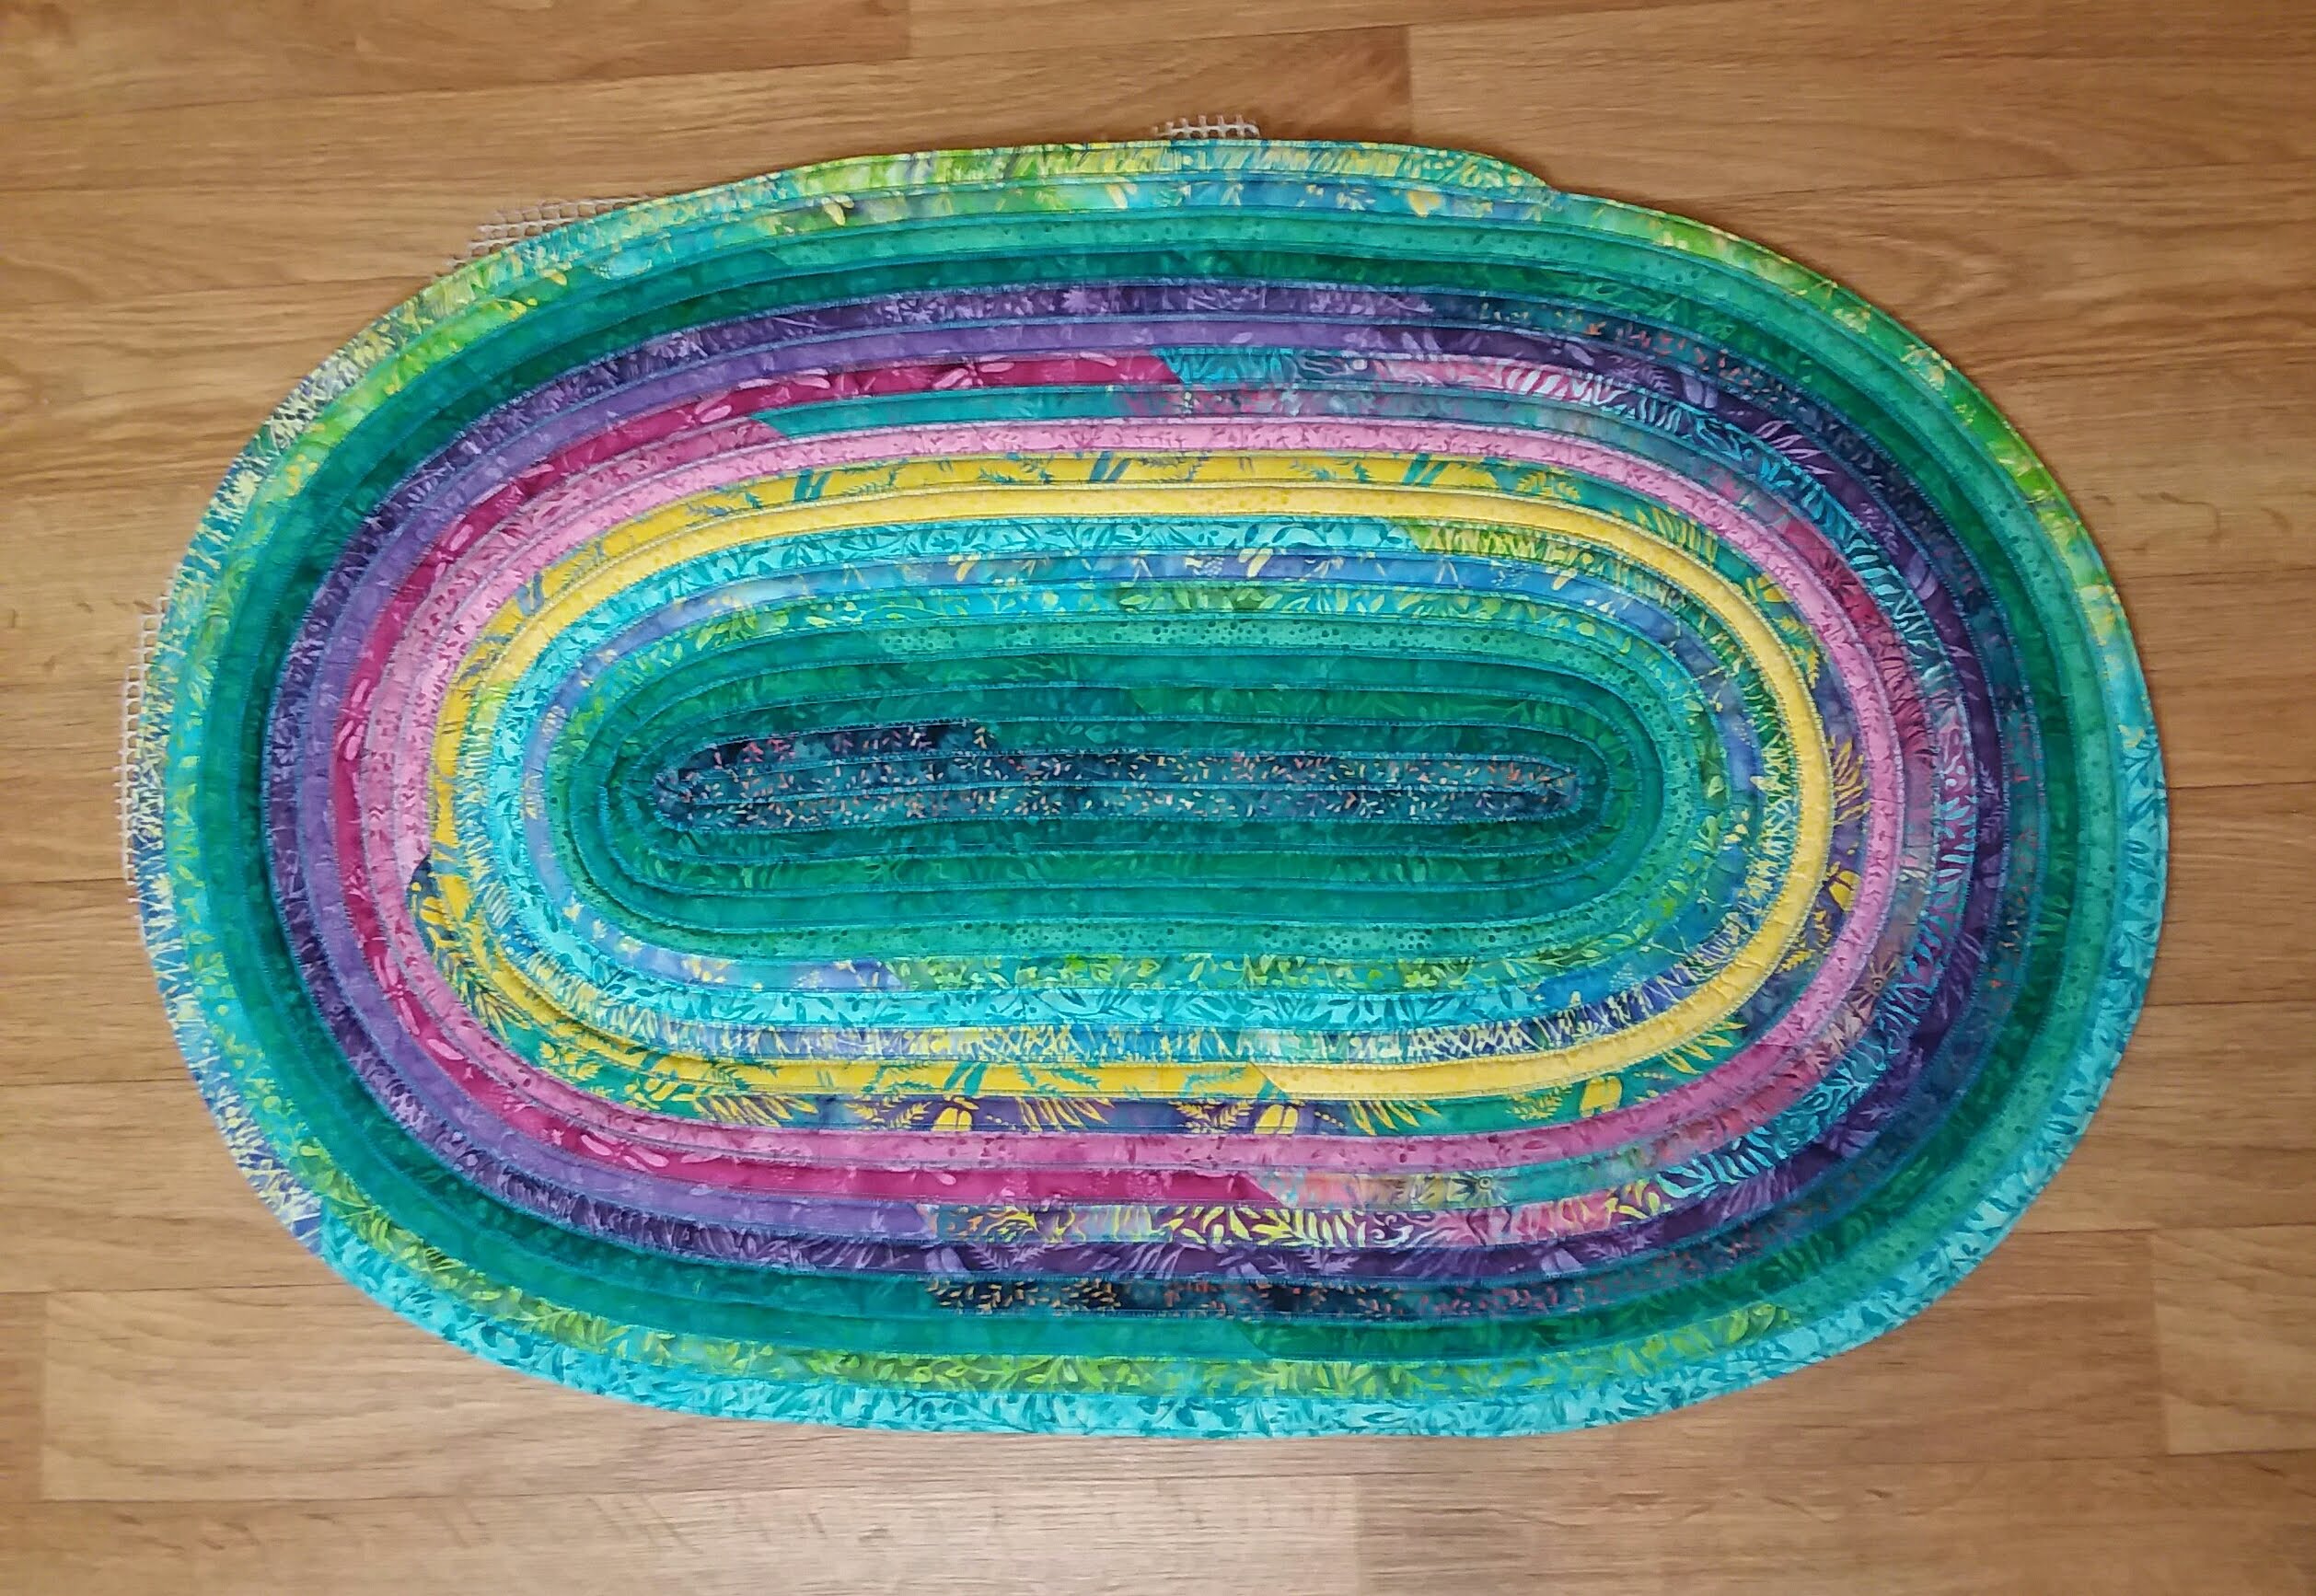
One of the first things that I thought of making was a rug. I've wanted to make one with Island Batik fabrics for awhile, but the challenge never came up. Here is the rug I made for this month.
I have made a couple rugs using 2 1/2" strips of scrap fabrics and scrap pieces of batting. That is a great way to use up loads of scraps, but it is very time consuming.
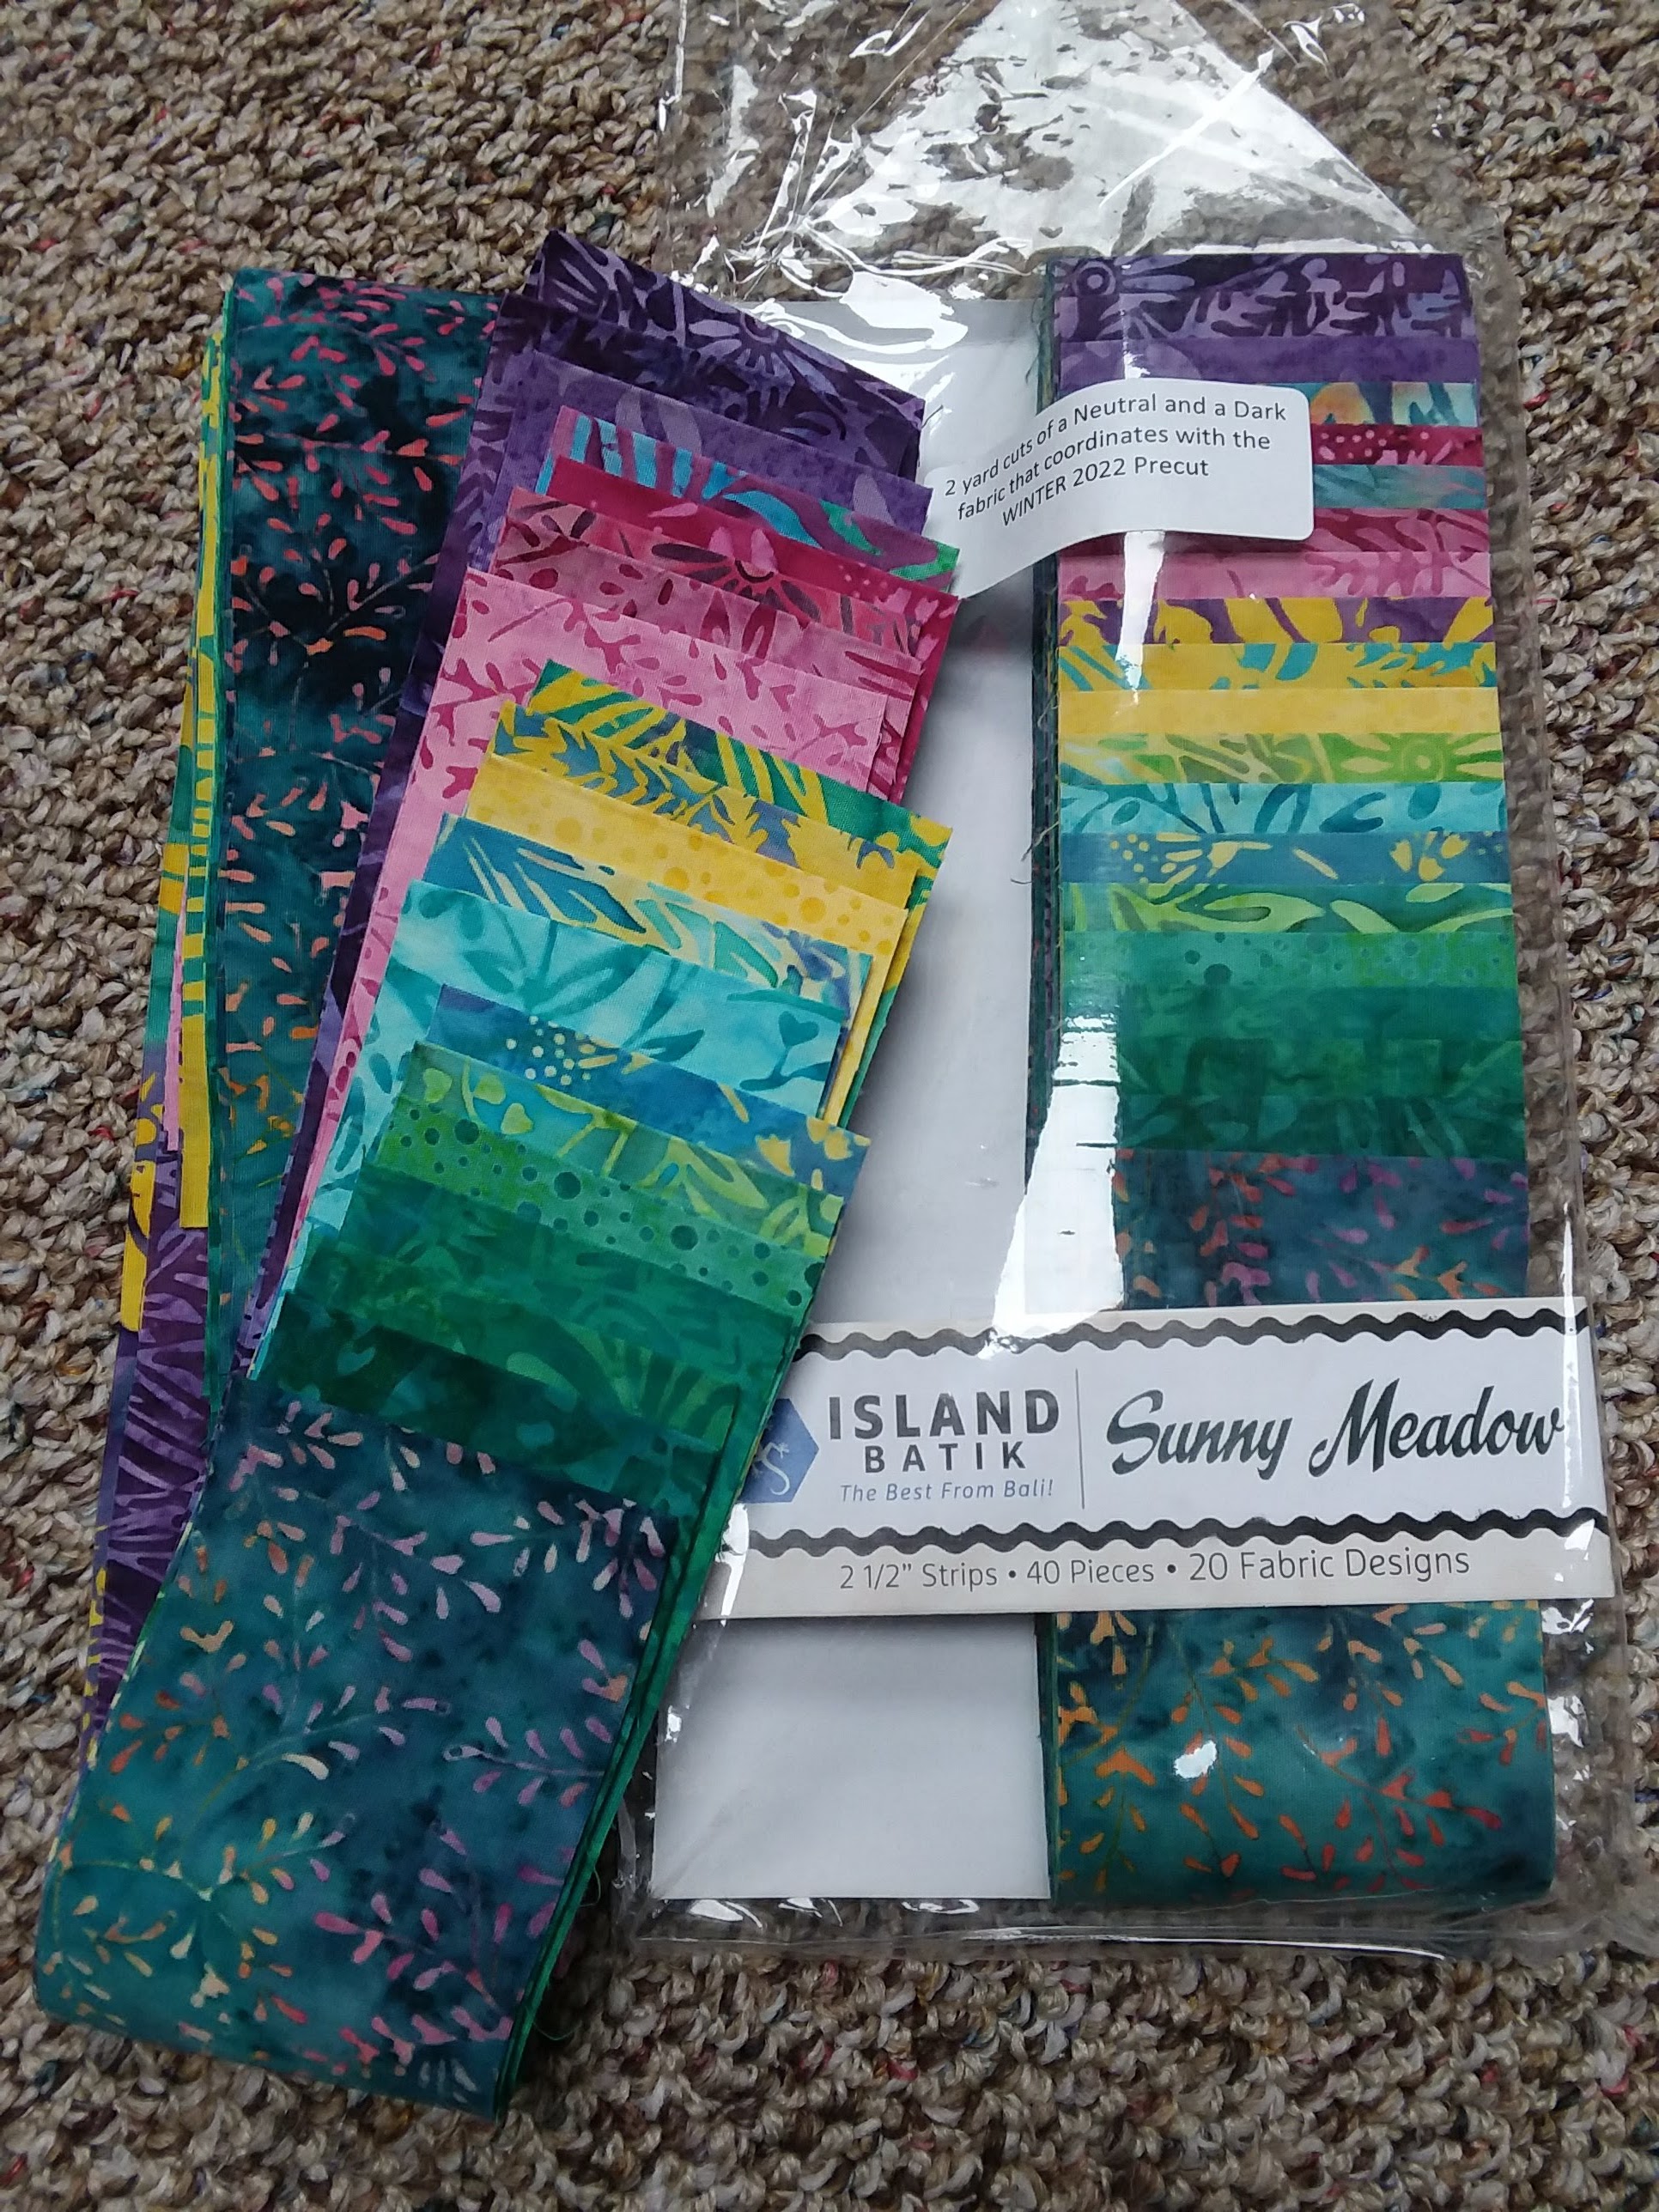
This time I used a 2 1/2" strip pack from Island Batik of the collection called Sunny Meadow by Kathy Engle. It's a Winter 22 Collection. I love the 2 1/2" strip packages. You can use them for so many things. I loved the colors in this collection.
I also used a roll of the 2 1/4" fusible batting strips from Hobbs. I've gotten a few rolls of the batting strips in past Ambassador boxes, but never used them. This was a great time to give them a try and they worked really well.
These rugs are really super easy and I couldn't believe how fast I got the rug made- only two days!
The first thing you do is sew your strips together just like you do to make binding. I wasn't sure how many strips I might need for the size of rug I wanted to make, so I started with just half a package of strips. It does make a LONG strip of fabric!
The way Island Batik has the fabric packaged is lovely and I just sewed the strips together in the order they were in the package. It turned out great that way and I didn't have to think about color placement myself.
Then it was time to try out Hobbs Fusible strips. The batting strips are fusible on both sides. You only really need the fusible on one side to make a rug. I decided to use a pressing sheet under the batting in case it would adhere to my ironing board cover. That worked well, but I'm not sure I really needed to do that, it is a very light fusible. Iron the fabric face up on top of the batting strip so your seams are against the batting. Again, you will have a VERY long strip.
Then you need to take the strip and fold both sides to the middle and fold again and sew about 1/8" from the side of the folded edges to secure the strip. I used clips to hold some of the strip together before sewing.
This makes a long finished tube to make your rug. Impressive isn't it! And so easy.
You need to decide if you want to make a round or rectangle rug. I knew I wanted to make a rectangle rug like I had made before, so I knew how long of a strip to make in the middle. Once you decide that, then it is just a matter of zigzagging in a large stitch where the rows touch and sewing round and round and round. Sort of mindless! A good time to listen to an audio book.
You need to sew with the bulk of the rug to the left of the machine. If you start off with the bulk on the right side, just take it off the machine and turn it over and sew from the other side.
It turned out the rug wasn't as big as I wanted and I ended up using about 6 or 7 strips from the second half of the package and I used a small part of another package of batting strips. My rug measures 25" x 39". It's a nice size for in front of my kitchen sink.
A couple things to keep in mind- use the largest zigzag stitch you can make and also kind of scrunch your fabric as you turn the corners so that it doesn't buckle up. You can take your rug and iron it every few rows to also help it lay flat if you see it is starting to curve up.
You will want to sew with a coordinating thread. It takes a lot of thread, so make sure you have plenty on hand before you start. I used a nice spool of blue
Aurifil thread.
Schmetz needles sewed thru the layers very well.
The second project I made this month was a collage quilt.
This is my quilt called Croak.
Isn't he charming! Ha! I won this pattern online from Emily Taylor who is a great collage quilter. I made another one of her patterns called Woodlands and you can see the whole quilt
here.
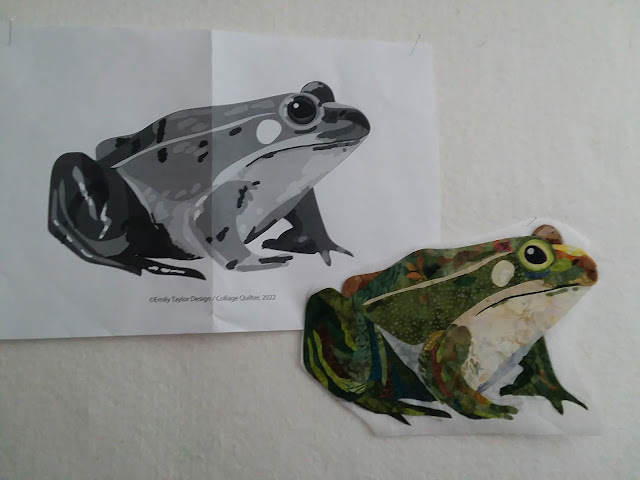
Below is the color photo of the frog pattern and part of the Woodland pattern behind it. I thought about making some mushrooms to go with the frog, but later decided not to.
I had this pattern laying around and really wanted to make it, so this was my incentive.
I used a big variety of Island Batik fabrics from my stash and fused pieces with
Steam a Seam 2 Lite so they were ready to cut up and use. Emily's patterns are in black and white, but there is a color photo of the quilt on the cover of the pattern.
It soon becomes a big mess.
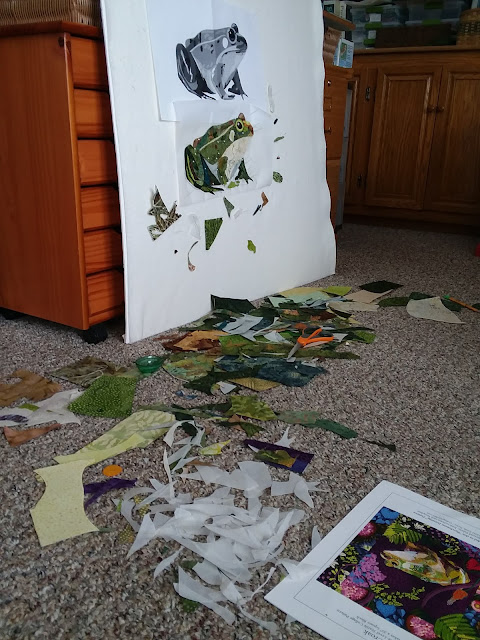
Eventually a frog appears!
Isn't he a charming fellow?
I played around with what colors to use for backgrounds. I'm not sure I would have thought of purple, but I liked how Emily used it in her design.
I used 7 different colors of
Aurifil threads to quilt with and a layer of
Thermore batting from Hobbs. Schmetz has some great nonstick needles that work really well when you are sewing thru fusibles. These needles are a darker gray metal which helps you distinguish between them and other needles.
The quilt is 20" x 15 1/2". I have a niece who teaches science and Croak is going to go live in her classroom.