
My first thought was to try a product I always thought looked interesting. After I looked into doing that- I found out it wasn't being made anymore. Guess I waited to long to try that one!
I finally decided to try making a quilt from a photo. I thought I'd try a photo of a face, so I selected one of my favorite photos of my Dad where he is laughing. My Dad passed away a couple years ago and I thought this would be a nice remembrance of him- if I could do it nicely!
I found two books on my shelf to help me out- Photo Inspired Art Quilts by Leni Levenson Wiener which was a technique book and very helpful and Deidre Scherer Work in Fabric & Thread which had beautiful illustrations of quilts she made of people.

The first thing I did was take my photo which was on the computer and enlarge it. It wasn't a very clear photo to begin with and got fuzzier each time it was enlarged.
I won't say I made mistakes on this project- but I did learn some lessons :
*Lesson learned- use a very clear photo to start with. It is also suggested you could work with some photo editing software that are available, but I didn't have any, so I just went with my original photo.
I drew around the highlights of light and dark colors. This may be a step some photo editing software will do for you, but I didn't find it very hard.

*Lesson learned - bigger can be better. Leni Levenson Wiener suggests 16" x 20" as a good size to work with when enlarging a photo. I would have made this project bigger, but my photo was getting to fuzzy to work with. Again- start with a clear photo...

I did crop the photo and took out all the background to make it easier.
There are different ways to make the pieces. I've seen where you can fuse the pieces with fusible web- but then you need to reverse the patterns. That seemed like an extra step and not easy with all the funny shaped pieces. You can also just cut the pieces and layer them - adding touches of glue once it is all assembled to hold it together. I decided to go this route and it seemed to work well although I did find it challenging to know which pieces would overlap or not.
I finally got the whole head and shoulders put together. I did very lightly glue the pieces in small spots so the pieces wouldn't fly away and I could lift it up. I decided to put a fusible web on the back to help hold this together which worked great- although the top pieces weren't secured more than with the spots of glue.
*Lesson learned - more glue would have secured the small, top pieces better.

I auditioned different fabrics for the background. Island Batik fabrics are beautiful - which one would work?


I

I finally decided on the last one for the background. I pressed the background fabric and fused the head and shoulders to the background. And then I stalled. I just wasn't sure how to quilt it. The little pieces were so tiny I was afraid they would lift up and shift as I sewed them. I wasn't sure I'd like it after I sewed the pieces and did the quilting...
Okay- it was a couple weeks until I decided I just had to DO it! So I decided on a very tiny zigzag stitch to go around all the pieces before I did any quilting. The tiny pieces behaved themselves and I got it all sewn with no problems. Why did I hesitate?
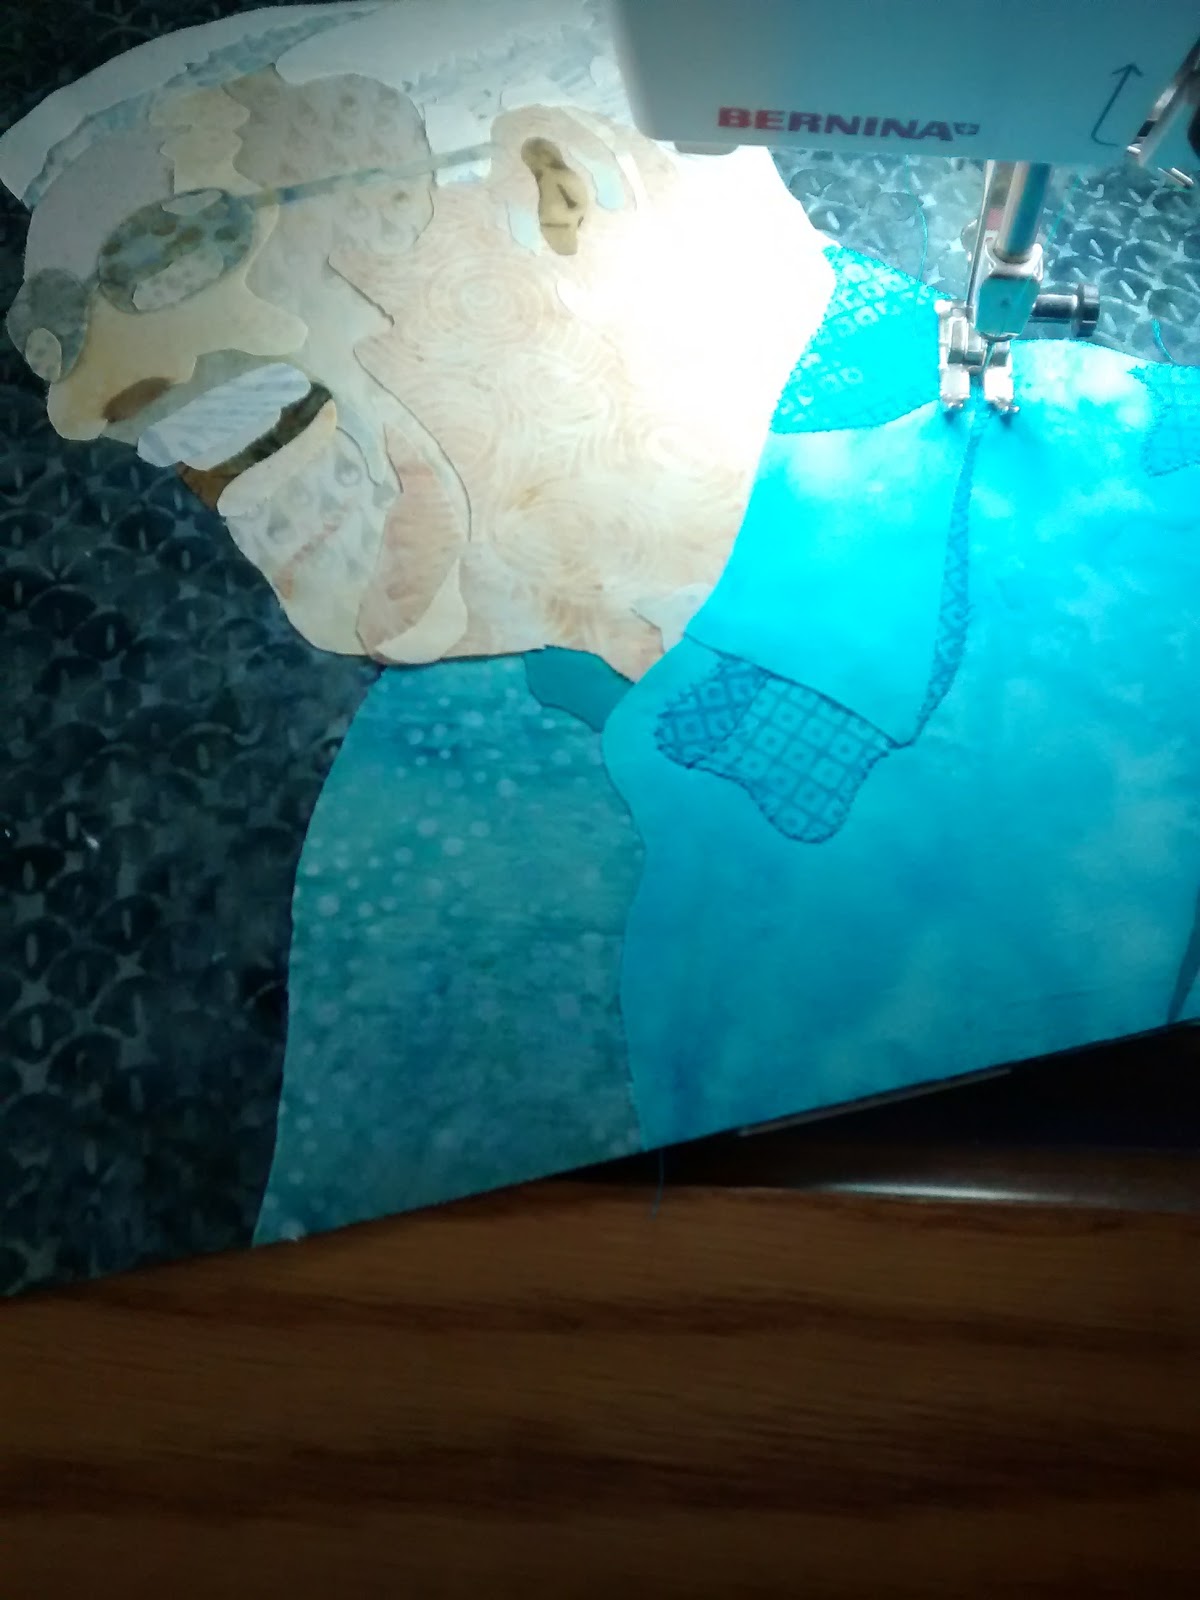

I used a double layer of Thermore Batting from Hobbs Batting and did some quilting around the shirt and areas of the face and the background with straight stitching. I think the face might benefit from further thread painting, but that would be another future challenge!

I love the Ackfeld wire stands to display small quilts.
Here is the quilt where it sits on the shelf above my computer.

This was a great challenge and it was interesting to see what all the other Ambassadors did this month. Below you can check out other Ambassadors blogs to see what they created this month.
Thank you to Island Batik and Hobbs Batting for providing supplies for this project.
Alison at Little Bunny Quilts
Amy at Sew Incredibly Crazy
Anita at Quilt in a not-Shell
Anna at Ark Angel Creations
Anne at Sweetgrass Designs
Barbara at Bejeweled Quilts
Bea at BeaQuilter
Carole at Carole Lyles Shaw
Connie at Freemotion by the River
Connie at Kauffman Designs you are here!
Dione at Clever Chameleon
Geraldine at Living Water Quilter
Jackie at If These Threads Could Talk
Janet at Whispers of Yore
Jeanette at Inchworm Fabrics
Jen at Patterns by Jen
Jennifer at Curlicue Creations
Jennifer at Dizzy Quilter
Jennifer at Inquiring Quilter
Jessica at Desert Bloom Quilting
Joan at Moosestash Quilting
Joyce at heARTs Creations
Karen at Sew Karen-ly Created
Karen at The Quilt Rambler
Kathleen at Kathleen McMusing
Laura at Slice of Pi Quilts
Leanne at Devoted Quilter
Mania at Mania for Quilts
Maryellen at Mary Mack Made Mine
Michelle at Creative Blonde
Myra at Busy Hands Quilts
Nancy at Masterpiece Quilting
Pamela at PamelaQuilts
Sally at Sally Manke
Sandra at MMM Quilts
Sarah at Sarah Goer Quilts
Sharon at Yellow Cat Quilt Designs
Sherry at Powered by Quilting
Stephanie at Steph Jacobson
Teri at Lizard Creek Quilts


