It's the final day for the All Puffed Up Blog Hop - and finally my day to post!

We were instructed to make some kind of squishy Puff (or Bubble or Biscuit) quilt. Oh my! I didn't realize they were popular again. My Mom made my sister a Puff quilt over 40 years ago!
This wasn't something I have ever done- or ever had an interest in before. Once again Island Batik has a new challenge for us to create! It was interesting to watch some of the many videos online on how to make a Puff quilt. It's really not hard- but very different from traditional quilt making.
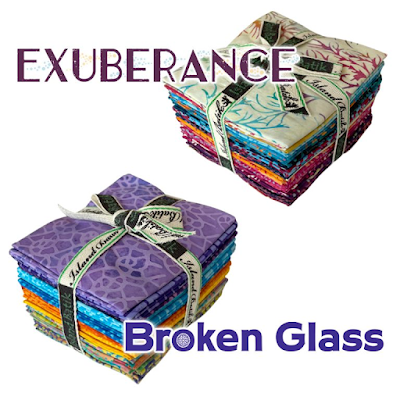
Each of the Ambassadors received a bundle of a new Island Batik Winter 2022 collection. I got the collection called Sunshine Garden by Kathy Engle. Look what bright and beautiful fabrics are here.

I decided to make a child size quilt using the traditional method (if there is a traditional method) of making squares. I loved the colors in this collection and decided I would use each of the fabrics. There are 20 fabrics in this collection and I cut 6 squares of each fabric 5" x 5". Then I cut up 120 solid white squares 4 1/2" x 4 1/2". This fabric will be behind the Island Batik fabric and in the middle of the quilt, so it won't show at all. This is a great time to use up some miscellaneous fabrics you don't care about.

Making the squares is very easy and there are good videos online that can take you step by step in making the squares and rows. Essentially all you do is take a tuck in the 5" square to fit the 4 1/2" square. You sew the tuck down in a scant 1/4" seam. It is very easy and timely to chain stitch these squares.
I used Schmetz needles and Aurifil thread for the piecing. Sewing goes fast with chain piecing.


You do this on three sides of the squares, then it is time to arrange the squares into rows. I hadn't decided on color placement, so I was able to just play around with all the squares I had made. After several arrangements, I just went with a sort of color wash of sunny garden blocks with kind of a color splash. I think a child will enjoy the bright colors.
This is one of the trial arrangements.

Once you have the blocks placed where you want you sew the blocks into rows. Make sure when you sew the rows together that the opening is always to the same side.
Take the first row and lightly stuff each pocket with fiberfill of some kind. Use about a handful of filling. I like to use things I have on hand, so I used the stuffing from an old, but clean polyester pillow. After the blocks are stuffed, sew the blocks shut making tucks like you did for the individual blocks. Then lay the next row of unstuffed blocks on top of the stuffed row - pin and sew with a 1/4" seam. The stuffed row will always be to the left side of the machine with the opening to the right so it is very easy to sew the rows together.

Then you stuff the row you just sewed on, and sew the next row on. Over and over until it's done.
I made 12 rows with 10 blocks in each row. It's now very puffy!

This shows rows in progress.
Now you need to decide to either quilt it - which is difficult with the bulk of the puffy rows, or tie it like a comforter. I decided to tie it - another thing I've never done before.
Once all the rows are stuffed and sewn together I laid it face up on the backing I had taped to the floor. I basted around all the sides to secure the top and back and then pin basted the whole quilt. I don't think I've ever pin basted a quilt before. It was hard on the fingers, but it did hold the quilt together nicely.

I should mention here that some people add a layer of thin batting over the backing before putting the quilt on top. I decided not to and was happy with the result.
Island Batik sent two coordinating fabrics with my collection to use if I wanted to. I used the light yellow Foundation fabric called Butter for the backing. It went well with the fabrics. I used a variety of the fabrics for the binding.

This time I decided to sew the binding on before doing the ties. I thought there might be some shifting of layers as I handled the quilt so doing the binding early would secure the top and backing together. Before I sewed the binding, I curved the corners slightly. I thought that looked good with the little puffs in the quilt top.
Sewing the ties on was also hard on the fingers. I decided to make an X on the top side of the quilt and tie the strings on the bottom side. I thought the X would look nice, but that was a mistake. I wouldn't do that again. Most comforts only have one stitch. By doing two stitches it meant I had to take stitches thru very thick intersecting seams. I had to use a jar rubber to pull the needle thru. It also took much longer to do.

The comforts I'm familiar with used yarn or Pearl Cotton to make the ties. In looking online I saw that some people tie with embroidery floss. I used to do a lot of Cross Stitch and I have a lot of floss, so that is what I used. It was nice to once again use what I had on hand, and the colors matched nicely. I used several different colors of thread.

This puff quilt is very interesting and I'm sure a child will love laying on all the puffs.

Thanks to Island Batik, Schmetz Needles and Aurifil Thread for providing products thru the Island Batik Ambassador program to make this project.
This is the last day of the blog hop. I hope you have enjoyed following along with all the Ambassadors. I have a drawing for two stash builder rolls. Leave a comment below telling me if you've ever made a Puff Quilt before and what you think of them. USA entries only due to postage costs.
The hop ends today so be sure and enter now. I will gather comments for a couple days before drawing a winner.

Ambassador Leah Malasky is also posting her amazing Puff quilt today, so be sure and check her post.