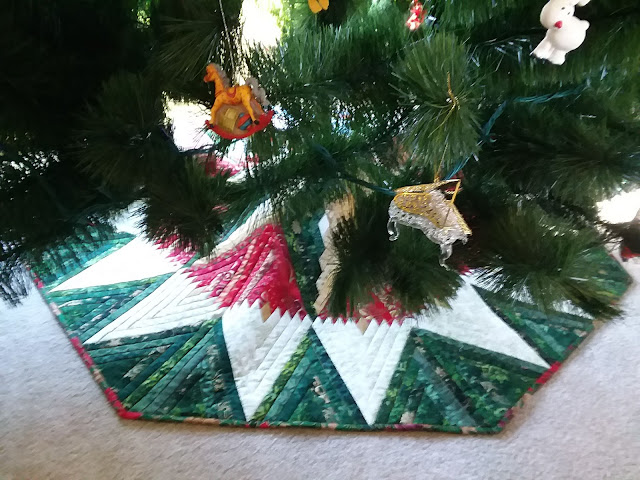
Floating Hexies
31 1/2" x 15 1/4"
Designed and made by Connie Kauffman
English paper piecing is the December challenge for the Island Batik Ambassadors. This is the last challenge for the year, and it was an interesting one.
Traditional English paper piecing was usually done with hexagons. There are many other shapes that are now used for EPP (English paper piecing). You can find many tutorials online on how to prepare the shape you've chosen to use. Essentially what you do is prepare a heavy paper in the shape you want to work with - for example a hexagon. Then you cut a piece of fabric about 1/4" bigger all around than the paper. You fold over and stitch the fabric to the paper - or stitch the corners together and press. Then you take two of the shapes and hand stitch them together along one edge. It makes a great take-along project. It's also a wonderful way to make use of small scraps.
I've done English paper piecing with hexies in the past. The first quilt show I ever went to (many years ago) had a class on Miniature English Paper Piecing that my sister took. Little did she know just how small the pieces would be! The individual pieces were only 1/2"!
I like miniatures, but that was extreme! She showed me how to make them and I did make some hexie flowers, but never completed a project. Cute, but oh so small! I have to admit that I glued the edges with a glue stick and over the years never removed the papers as I never finished a project with them. Sad to say, the little gems are very stiff and hard now and it's about impossible to stitch them together.
I made a quilt by fussy cutting the hexies called
Granddaughter's Flower Garden that was featured in the book
Quilting to Go. The hexagons in the quilt were all fussy cut with cute fabrics.
 photos courtesy of House of White Birches/Annies
Her book is great and these pieced hexie blocks can be turned in various ways to create different looking designs. They are fun to make.
Here is a photo of a pieced hexagon block 8" x 8" with one of my mini hexagon flower blocks 1 1/2" x 1 1/2" inside it. I don't think I'll be making anymore of those mini's !
Everything I've done in the past was interesting, but I wanted to do something different for this Island Batik Challenge. I thought about a lot of designs.
I wasn't crazy about doing a lot of hand sewing this time and I'd seen some modern quilts with hexies spaced apart, so that is the technique I decided to work on. This may be stretching the concept of English Paper Piecing, but it is using hexies and preparing hexies in the traditional way.
This quilt was going to be modern and I wanted to add a couple other challenges for myself. I had purchased a
Sewline Fabric Glue Pen at a past quilt show and had never used it. I decided instead of tacking down all the edges of my hexies with needle and thread I would glue them down! Wow was that fast! And not messy at all!
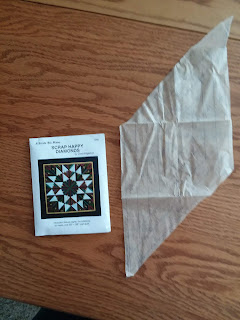
I found a pattern for hexagons online. This one is 1 1/2" and I just printed them out and cut out all the shapes I needed.
I read that it is also helpful to have a hole in the paper so that it is easier to remove the paper once the edges have been folded in and secured, and pressed. I just used a hole punch. The holes weren't in the center, but it did make removing the papers very easy. First I ran a pin under the glued edges. The fabric separated from the paper very easily, then I put the pin in the hole and popped the paper out. I didn't even have to press them again. After I'd glued all the hexies, I removed all the papers.
After deciding how I wanted to lay out the hexagons I decided to chalk mark the lines on my quilt top.
First I layered my favorite batting-
Hobbs Heirloom 80-20 Fusible with the quilt top and backing and ironed them together. This made a very secure piece to work with and easy to do the chalk marking.
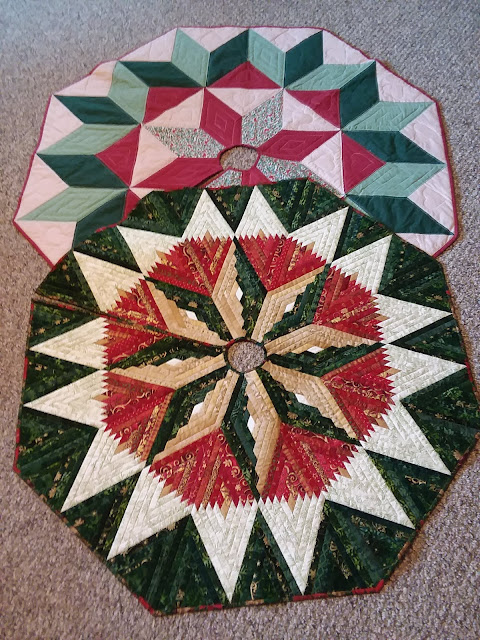
I first placed a hexie in the very center and marked lines thru each point. Then the rest of the lines were 1/2" apart. You can see on my little sample on the lower left how each hexie is 1/2" apart and a line will be quilted between each one and thru each point. The marking made the placement of the hexies very easy.
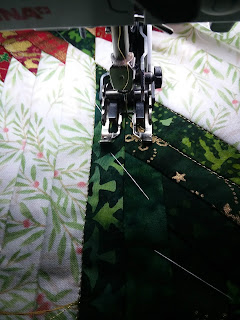
To further make this an easy project, I glued all the hexies down with the Sewline Fabric Glue Pen. I only put glue on the corners. This held them very securely while I did the straight line sewing with my walking foot. I did really like this glue pen. The glue held well and didn't make the fabric stiff and didn't gum up the needles. My only regret with the pen is that you can't see how much glue you have left. I did end up using the whole stick of glue in the pen with this project. The package come with a refill, but I would have been really sad if I had run out in the middle of the project.
I used a lovely variegated thread for the quilting that picked up all the colors in the fabrics.
Floating Hexies was an interesting project. I tried a couple new techniques and a new product. And of course using Island Batik fabrics will makes a project shine! It's always good to expand your quilting experiences!
*The winner from my Nov blog hop is Kathleen. Her fabrics are on the way!
Many thanks to Island Batik and Hobbs Batting for providing products to use in this project thru the Island Batik Ambassador program.