Wednesday, September 30, 2020

Azure & Arrows in Love of Quilting

My pattern Azure & Arrows has been published in the Nov/Dec 2020 issue of Love of Quilting.

Azure & Arrows

Designed and made by Connie Kauffman

37 1/2" x 37 1/2"

(photo courtesy of Love of Quilting)


The fabrics are from the line Faded Blue Jeans by Kathy Engle for Island Batik.  They are lovely shades of blue with a great mixture of prints.  And yes- they do have a faded blue jeans look!  Great name for the collection.

This quilt has a lot of movement and things going on.  You can easily see the arrows in the design, but can you see the wrenches?  And do you see the four stars in the center?  I actually began the design with the four stars and went out from there.  I added some buttons for added embellishments.


Monday, September 28, 2020

Blog Hop- Last Week

This is the last week for the It's In The Bag Blog Hop.  I hope you've been following along with all the great bags the Island Batik Ambassadors have been making.  Each post has been so informative on creating the ByAnnie bags and the Island Batik fabrics have been amazing. 

There are only two bags yet to see this week so be sure and check them out.  You can also go back and see all the bags in the last 3 weeks by clicking here.

Don't forget to enter the Island Batik fabric drawings on their blog this week


Don't forget you can enter my drawing also until this Friday.

Have a great week!

Monday, September 21, 2020

First Light - McCall's Quilting

 My quilt First Light has been published in the Nov/Dec issue of McCall's Quilting.  I used the beautiful fabrics from the Sundance Collection of Island Batik fabrics designed by Kathy Engle.


First Light
14 1/2" x 14 1/2"

Designed and made by Connie Kauffman

McCall's Quilting Nov/Dec 2020

                                                    Photo courtesy  of McCall's Quilting 

Wednesday, September 16, 2020

It's In The Bag Blog Hop -Take A Stand Bag

The September Island Batik Ambassador Challenge is called - It's In The Bag

Who doesn't love a new bag?  By Annie patterns can help you make something wonderful!


This was s a great challenge.  I've wanted to make a By Annie's pattern for a long time.  In the second Ambassador box we all received a bundle from Annie's that contained everything we needed to make one of her bags.  How great is that!  My bag pattern was for Take a Stand.  Here are photos of what all was in the kit - the pattern, Soft & Stable, zippers, mesh, hardware, etc.  And of course- a selection of Island Batik fabrics.  So exciting!


Here's some close ups of what was in the package.
The Aurifil thread came in the Ambassador box, not in the kit.  Doesn't it match great!
The Island Batik fabrics were chosen by Annie - we didn't have to make any decisions.  Her choices are spot on!   My fabrics are from the Mandala Magic Collection designed by Jackie Kunkle of Canton Village Quilt Works.  This is a Spring 2020 Collection and will be  in stores soon.                    


Zippers and hardware (rings, swivel hooks & sliders).  My bag had a bonus- enough of everything to make 2 bags - one of each size!


Mesh and beautiful fold over elastic - both which I've never used before.


By Annie's Soft and Stable foam stabilizer, 1" polypro strapping and a solid base for the large bag.
All of these items are available at her website ByAnnie.com.  This Soft and Stable is WONDERFUL for making bags!  Be sure and try it out.


By Annie's patterns are very detailed, but wonderfully laid out in step by step instructions.  Each piece has a label to keep you organized.  I laid out my pieces for each bag separately.


The main body pieces are quilted however you like.  She suggested straight line quilting, so I quilted one bag with straight lines and the other bag with diagonal lines to see how it would look each way.  I think I liked the diagonal best.


I have to admit that zippers still intimidate me.  Her instructions are very good.  I forgot to mention that with the pattern there was a coupon for a free online video to help with making the bag.  That was very helpful- especially if you are visual learner.  Sometimes worded patterns can be confusing.  Annie has loads of online videos that are wonderful.  Such a great bonus!


I have never used mesh before.  I never thought about how you would cover the top edge.  Annie's fold-over elastic is SUPER easy to use.  It is very pretty and both the mesh and elastic come in many colors on her website.

Side panels and main panels.  After many steps it is all coming together!


The zippers on each side were easy- now for the top zippers


The large bag came with an acrylic piece for the base.  That makes it super sturdy and you can even carry a small sewing machine in it!  Notice the great mesh pockets on each side. And NO exposed seams anywhere!


Here are the two bags completed.  The larger bag measures 12 1/2" H x 16"W x 8"D
The smaller bag measures 8 3/4" H x 12"W x 6 1/2"D
They each have a long carrying strap with an adjustable slider.


The small bag fits inside the larger one.

The larger bag will fit an iron or small sewing machine.  Notice how the bag opens fully when unzipped.  That can be very handy.


Here it is with my small Gem Gold sewing machine zipped inside.


I just had to take a photo of the bags with my petunias.  I thought the colors  looked good together!


The smaller bag has a companion project called Running With Scissors.  Yesterday Ambassador Emily Leachman made this great project.  It is a zippered case that you can open up and actually fold over the top of the smaller bag above so that all your tools are easily accessible.  Check out Emily's blog for more information on that project.

This is the second week of the blog hop - go back to my last post to see the listing of all the Ambassadors and what day they are posting and what fabrics they are using.  Don't miss a day!

Be sure and go to the Island Batik Blog this week of the blog hop to enter for a chance to win one of two beautiful fabric bundles - Lemon Grass and Mandala Magic


Leave a comment below to be entered into my drawing for two stash builder bundles of Island Batik.  Tell me if you have ever made a ByAnnie's bag or any other kind of bag.  I will draw a winner with Random.org. at the end of the blog hop.  USA entries only due to postage.


*Thanks to Island Batik, Auriful thread and ByAnnie/ for the supplies to make this project.


Monday, September 7, 2020

It's In the Bag Blog Hop- Starts Tomorrow!


The It's In the Bag Blog Hop starts tomorrow and runs for the next four weeks.

The Island Batik Ambassadors are all making a projects from ByAnnie.com.  She has something for everyone – from handy zippered handbags, duffles and backpacks to laptop carriers, sewing supplies organizers and classy travel bags! New Island Batik collections from the Spring 2020 Collections from the second Island Batik Ambassador boxes will be featured. We hope that you will follow along to see all the amazing creations and get inspired to make a beautiful bag for your next adventure, big or small!

The full list of Ambassadors’ names, collections they will be using in their projects, and their post dates are as follows:

September 8:

September 9:

September 10:

September 11:

Blog Hop Round-Up Week 1 and Giveaway

September 14:

September 15:

September 16:

September 17:

September 18:

Blog Hop Round-Up Week 2 and Giveaway

September 21:

September 22:

September 23

September 24:

September 25:

Blog Hop Round-Up Week 3 and Giveaway

September 28:

September 29:

Blog Hop Round-Up Week 4


Each Friday Island Batik will be posting round-up's and having fabric giveaways.

To celebrate the start of It’s in the Bag Blog Hop, Island Batik is giving away two fabulous Fat Quarter bundles of Buttercup and Floralicious collections by our very own Kathy Engle!

Go to the Island Batik Blog to enter the drawing - starting now!


Check the Island Batik Blog regularly so you do not miss a thing!


My day for posting is the 16th.  I can't wait to show you what I've made!

Monday, August 10, 2020

August Try a Tool Challenge


 August 2020 Island Batik Challenge Quilt


Passages by Connie Kauffman
25" x 25"

The challenge for the Island Batik Ambassadors for August was called Try a Tool.  The new sponsor for this challenge was Deb Tucker's Studio 180.  Studio 180 specializes in rulers that simplify and make accurate blocks.


I received the Wing Clipper Ruler that makes the traditional flying geese units, along with the narrow Quilter's Magic Wand ruler.


I like flying geese, so my next challenge was choosing which Island Batik fabrics to use.  I decided on the fat quarter bundle of Whispering Feathers designed by Kathy Engle that I had been sent.  These fabrics are in the stores now.


Here I'm already thinking of how to  use them.  This collection was a challenge to me because it had color combinations I wasn't totally comfortable using together.  I'm not sure I've ever made a quilt with purple, red and orange together!


So- the next challenge was what design to use in my quilt.  The pattern had to have flying geese units so I could use the ruler, and we had to have at least 16 units in the project.  I looked thru some pictures of quilts that I have in a folder that I'd like to make someday and found one from the Jan/Feb Quilter's Newsletter 2000.  It was a quilt called Plaid Stars by Brenda Henning that was featured in an article about the Delectable Stars block.  So, taking the idea from a section of the quilt I was able to make a variation by resizing, creating some new blocks and changing things up to fit the fabrics.

Now to actually making the quilt and using the Wing Clipper and  Quilter's Magic Wand Rulers.
I have to admit here that I am NOT a person that buys a lot of different rulers.  I've found in the past that some rulers are only good for one thing and you have to read the instructions carefully each time you use them.  But- we were graciously given these rulers to try, so I was game to give it a go.

I like flying geese blocks and have made them often using paper piecing.  I like paper piecing because it is so precise and you can make any size block you want.  There is little waste and I have found many other rulers leave a lot of waste when making their blocks.

Let me tell you I was REALLY impressed with the Wing Clipper Ruler!  It comes with a simple instruction sheet that is very easy to understand.  AND it comes with a free video demonstration that is fantastic.  What I especially like is that the instructions tell how you can make blocks from 1/2" to 10"!  Wow!  I like to make small quilts and sometimes rulers aren't designed to make smaller blocks.  The pattern I designed had 1" x 2" flying geese  units so this ruler worked great.

Without going into a lot of detail, there are just a few steps in making the flying geese units.  You start with a large square and two small squares  laid out like the upper left block.  You line up the Quilter's Magic Wand down the center and mark on both sides for sewing lines.  Then you cut thru the center and press the blocks out..  Then you add other small squares (the instructions tell you what size squares you need) at the point, draw the lines with the Quilter's Magic Wand, sew on the lines and cut again.  Press and you have the flying geese unit.

Five squares made 4 flying geese units.


The final step is trimming the unit to the correct size.  This is what your ruler is for- and it is very simple to understand.  See how little trimming is needed?  You trim both sides.


Okay- I'm very impressed.  I made 48 units- and see how little waste there was!


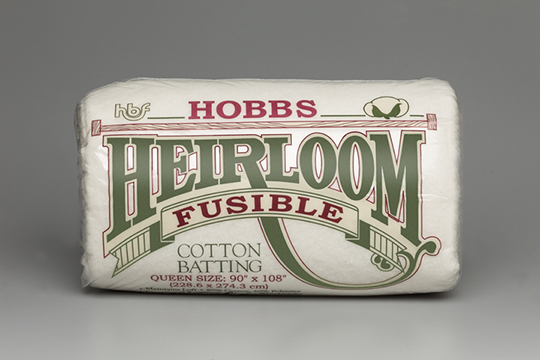
Another new thing I tried with this quilt was Hobbs Fusible Cotton Batting.  Hobbs batting is one of the Island Batik Ambassador sponsors and this time we were sent one of their Fusible battings.  I didn't even know they made fusible battings!

Hobbs Heirloom 80/20 Fusible Batting (image)

I had used fusible battings in the past, but the brand I was using either quit making it or I couldn't get it anymore, so I was excited to try Hobbs.  Basting is probably my least favorite part of quilting, so this is a plus!

I was VERY impressed with the fusible batting! It is still an 80/20 Cotton/Poly blend. It fused very easily and it fused well to the back for me.  You can turn it over- reposition and repress the back if you get any puckers, but I didn't have an issues.  This is a small quilt- only 25" x 25", so I was also able to just press it on my ironing board and not even get down on the floor.

I also wondered about how the loft would be since the batting had been pressed.  I found it had good loft which really surprised me as many regular battings I'm finding today are very thin with little loft.
I'm SOLD on this batting.  Thank you Hobbs!

I used two Aurifil Threads that matched very well with the fabrics - red 1103 and brown 6010.   The new Schmetz Chrome needles are also great to sew with.

Well, I'd call this project a success!  Several great new things tried.  Thanks to sponsors Island Batik, Deb Tucker's Studio 180 Design, Hobbs Batting, Aurifil thread and Schmetz Needles for the products used in this project.